WHMCS Integrations
Liquid ResellerCamp WHMCS Registrar Module Installations
- Get the API key
- Login to the ResellerCamp’s reseller control panel (the url will be in the email you received when you signed up) and then go to Settings -> API.
- Please note your reseller ID at the bottom of the page.
- Click Add API Key button, enter the label and the IP address of the server where WHMCS is installed to authorize it for API access.
- On the same page, note down the API Key.
- Copy the whmcs module files
Download ResellerCamp’s WHMCS Registrar Module
- For PHP 8.1, Ioncube 10.2 (last updated 2023-02-07)
- For PHP 7.4, Ioncube 10.2 (last updated 2022-02-16)
- For PHP 7.3, Ioncube 10.2 (last updated 2022-02-16)
- For PHP 7.2, Ioncube 10.2 (last updated 2020-06-02)
- For PHP 7.1, Ioncube 10.2 (last updated 2018-07-20)
- For PHP 5.6, Ioncube 10.2 (last updated 2018-05-17)
- For PHP 7.2, Ioncube 5.6 (last updated 2017-10-05)
- For PHP 5.6, Ioncube 5.5 (last updated 2017-10-05)
Extract the zip files to /YourLocalPath/whmcs/modules/registrars
Remember to replace “/YourLocalPath” with the actual location where you installed WHMCS.
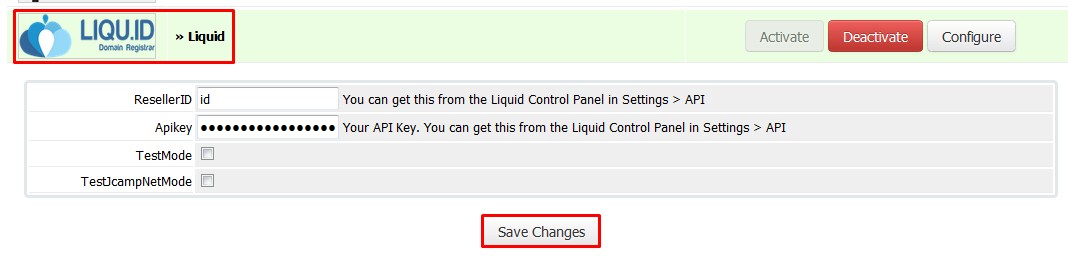
- Setup WHMCS Configuration
- Now, login to your WHMCS Administration Area
- Go to Setup > Products/Services > Domain Registrars
- Choose “Liquid” in the registrar dropdown menu and enter both the Reseller ID and API Key noted above.
- Then click Save Changes
And that’s it, WHMCS will now be able to communicate with your ResellerCamp account to automate domain registration & management for your customers.
Demo Mode
To use the ResellerCamp demo mode or test mode, it’s not as simple as ticking the demo mode option in the configuration area. You must setup an account separately on the dedicated resellercamp’s demo system. Read the Creating Demo Reseller Account documentation.
Next enter your demo account details under Setup > Domain Registrars > ResellerCamp. With the Test Mode checkbox ticked you can now place domain registration orders in WHMCS, the domains will appear on your demo ResellerCamp account but no domain will actually be registered and you will not be charged.
Note
Live nameservers created at the Registry will return a Nameserver is not a valid Nameserver error unless they are created/registered in the demo environment.
The demo control panel will try to check the validity of the nameservers in the demo platform and not on the Registry, so you must register the nameservers first before attempting any domain registrations on the demo platform.
Synchron domain WHMCS with LIQUID
Synchron status Transfer in, expired date and status
This Feature is already included with WHMCS and it’s disabled by default. By enabling this feature, any domain activity such as status, expiry, and transfer status will sync with data in liquid. The following step to enable this feature are :
- Setup > General Settings > Domains
- Checklist domain Sync Enabled
- Don’t choose Sync Notify Only
- Add cronjob
- 0 0 * * * php -q /YourPathWHMCS/crons/domainsync.php that Cronjob will call skrip crons/domainsync.php once a day. each called will have 50 domains to be synced in scrolling, if all domains have been synced then it will start all over again.
Synchron status Transfer out
LIQUID provide a cron that allows the domain already transferred out to update the status to Expired, the steps :
Download liquid cron here
- For PHP 7, Ioncube 10.2 (last update 2018-05-17)
- For PHP 5.6, Ioncube 10.2 (last update 2018-05-17)
- For PHP 7, Ioncube 5.6 (last update 2017-10-17)
- For PHP < 7, Ioncube 5.5 (last update 2017-10-17)
Move the downloaded liquid folder to /YourPathWHMCS/crons/
Rename /YourPathWHMCS/crons/liquid/config.sample.php become /YourPathWHMCS/crons/liquid/config.php and then set this part :
- Database connection
$lq_cron_db = array( 'host' => 'localhost', 'username' => 'username', 'password' => 'password', 'db' => 'databaseName', );- Set liqu.id account
$lq_cron_registrar = array(
    'liquid' => array(
        'api_url'     => 'https://api.liqu.id/v1/',
        'reseller_id' => '',
        'api_key'     => '',
    ),
    'resellercampid' => array(
        'api_url'     => 'https://api.liqu.id/v1/',
        'reseller_id' => '', // If you have account manage under resellercamp.id
        'api_key'     => '',
    ),
);
Add Cronjob
0 0 * * * php -q /YourPathWHMCS/crons/liquid/synctransferout.php Once a day call the script crons/liquid/synctransferout.php to chek poll message, if there is a domain transfer out from liqu.id the status will change become expired. You can view log syncron at /YourPathWHMCS/crons/liquid/report/synctransferout-Y-m-d.log.
WHMCS Addon - LIQUID PANDI Document Management Module
This module provides tools for registrar / domain resellers who use LIQUID software. This module is used for document management of domain registration requirements in PANDI. The required documents can be uploaded using the WHMCS member area and can be managed by registrar/reseller through the WHMCS admin page. Documents that are already uploaded will be automatically sent through URL api.liqu.id thus making the approval process easier.
WHMCS Addon Installation for Uploading Documents to Liquid
Before you start, please download WHMCS AddOn Module Document Upload below :
- For PHP 7.2, Ioncube 10.2 (updated at 2020-12-17)
- For PHP 7, Ioncube 5.6
- For PHP < 7, Ioncube 5.5
- Create a new folder and name it documents in whmcs installed.
- Copy the addon files to folder modules/addons.
- Login.
- Go to Setup menu > Addon Modules, then activate addon.

- Configure addon, enter reseller id, apikey, and google recaptcha key (public & server). How to get a google recaptcha key can be seen here.

- Modify template to add links to Document Upload page.
Note
Document Upload page can only be accessed in
http://domainname.com/index.php?m=liquid_upload_document&domain_id=ID_Domain
Link directing to the page can also be added in file clientareadomaindetails.tpl in folder templates/{active_template}/
Example of link code:
<a href=”index.php?m=liquid_upload_document&domain_id={$domainid}” class=”btn btn-primary”>Upload Document</a>
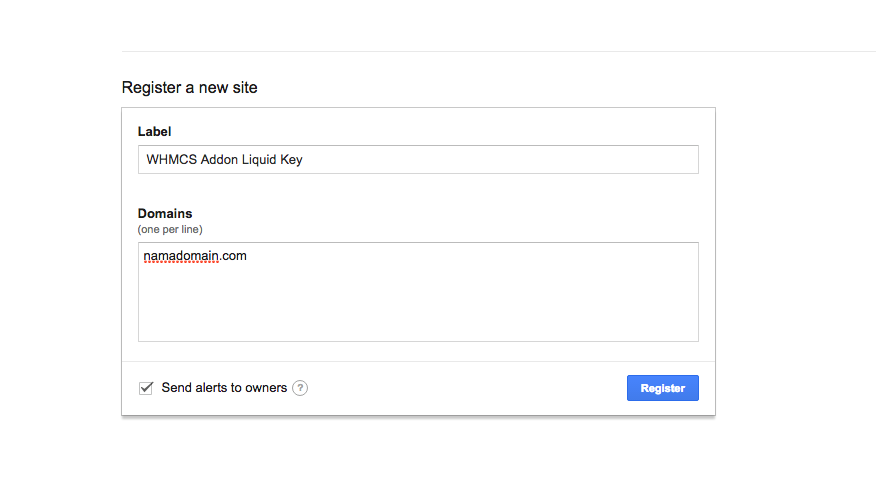
How to get Google Recaptcha Key
- Go to https://www.google.com/recaptcha/admin#list
- Create a new sitekey
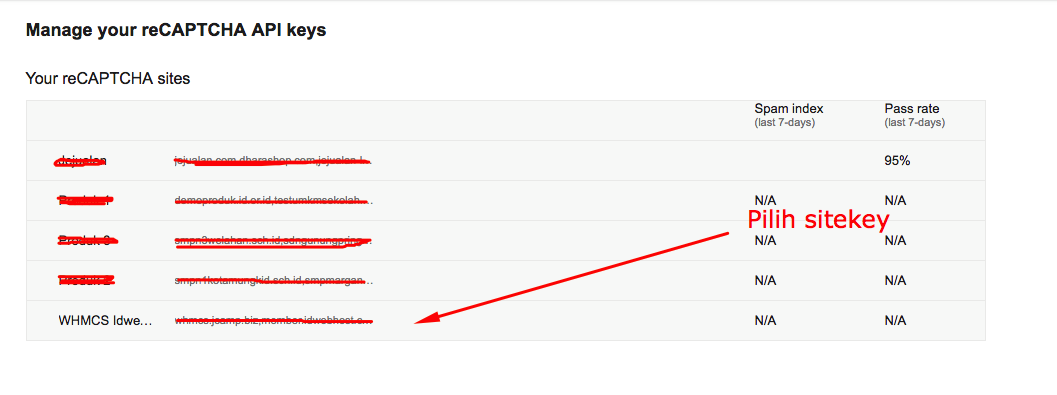
- Select a sitekey
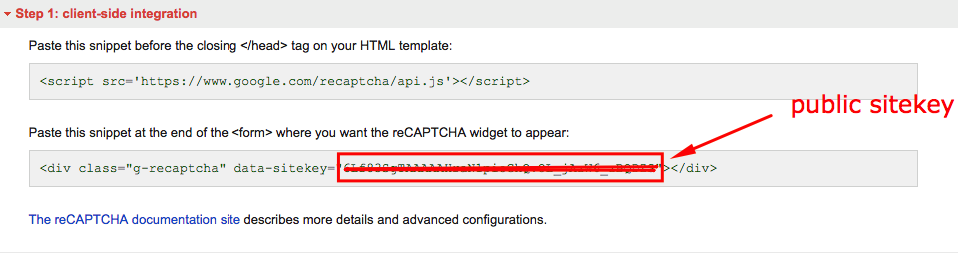
- Take public key and secret key
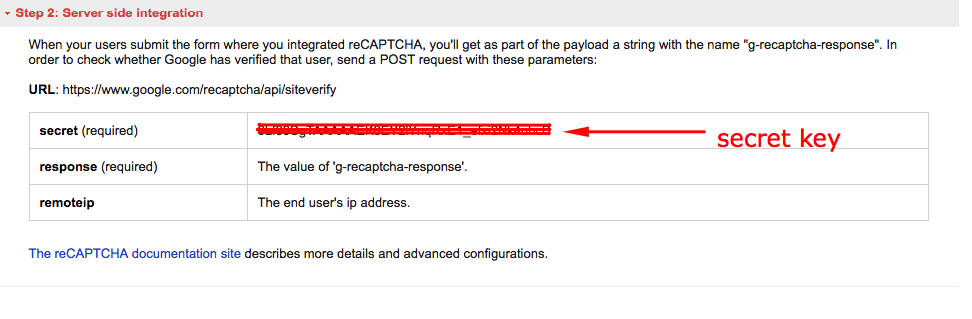
Note
Since this addon uses a recaptcha service from google, you will need a captcha key you can get after registering in recaptcha.
WHMCS Addon - LIQUID DNSSec Management Module
This module provides tools for registrars/domain resellers who use LIQUID software. This software is used for DNSSec data management with LIQUID module registrar. To use this module, make sure that you already use LIQUID module registrar on the domain you register. Only domains that are already registered in LIQUID can use this DNSSec module.
WHMCS Addon Installation for DNSSec Management
Before you start, please download WHMCS AddOn Module Liquid DNSSec Management:
- For PHP 7.2, Ioncube 10.2 (updated at 2018-08-13)
- For PHP 7.1, Ioncube 10.2 (updated at 2019-09-27)
- For PHP 7.2, Ioncube 5.6 (updated at 2018-08-13)
- For PHP 5.6, Ioncube 5.5 (updated at 2018-08-13)
- Extract the files you just downloaded.
- Copy folder liquiddnssec from folder modules/addons to folder modules/addons in whmcs user directory.
- Login as administrator.
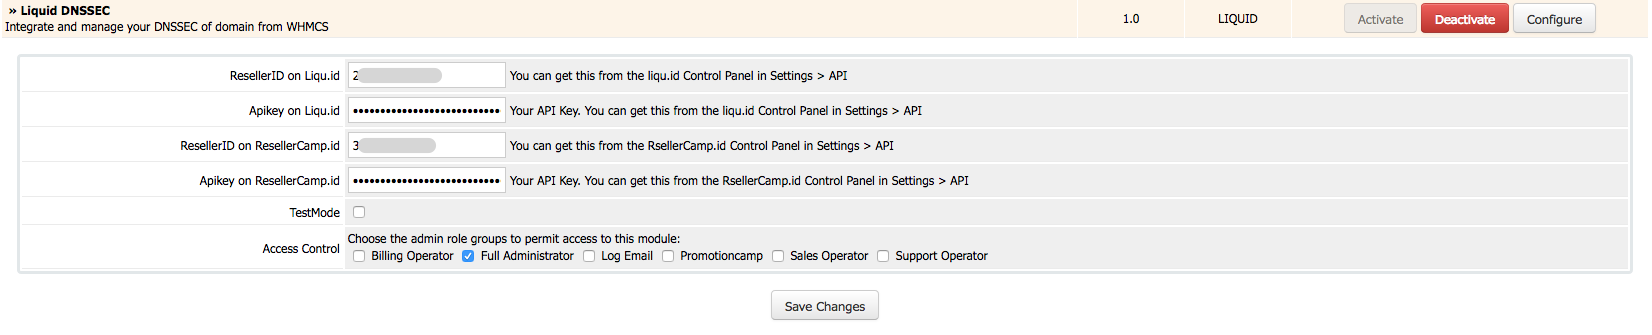
- Go to Setup menu > Addon Modules, and then activate addon.

- Configure addon, enter Reseller ID and Apikey
- After the installation and configuration is done, Liquid DNSSec submenu will appear in Addons menu on the admin page.

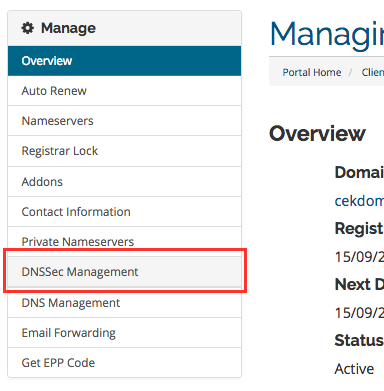
- DNSSec Management submenu will also appear on the sidebar of Manage menu on the client domain details page.
Demo Mode of DNSSec Management
Enter your demo account details under Setup menu > Addon Modules, in Liquid DNSSec. With the Test Mode checkbox ticked you can now manage your dnssec domain in WHMCS, the dnssec domain will appear on your demo ResellerCamp account but no domain will actually be registered and you will not be charged.
WHMCS Addon - LIQUID PANDI Premium Domain Management Module
This module provides tools for registrar / domain resellers who use LIQUID software. This module is used for management of PANDI Premium domain.
WHMCS Addon Installation for PANDI Premium Domain
Before you start, please download WHMCS AddOn Module PANDI Premium Domain below :
- For WHMCS 8 PHP 8 (updated at 2023-02-07)
- For WHMCS 8 PHP 7.2 (updated at 2022-03-17)
- For WHMCS 7.7 PHP 7.1 (updated at 2021-04-19)
- For WHMCS 7.6 PHP 7.1 (updated at 2020-04-29)
- For WHMCS 7.6 PHP 5.6 (updated at 2020-04-29)
- Set min length restriction domain and max length restriction domain according to tld premium domain which will be registered in configuration.php file.
Example : $DomainMinLengthRestrictions[".co.id"] = 2;
          $DomainMaxLengthRestrictions[".co.id"] = 63;
- Extract the files you just download.
- Copy the addons file to folder modules/addons.
- Copy this template file according folder structure. The original file should be backup first.
a. /templates/orderforms/standart_cart/configureproductdomain.tpl
b. /templates/orderforms/standart_cart/domainregister.tpl
c. /templates/orderforms/standart_cart/viewcart.tpl
d. /templates/orderforms/standart_cart/common.tpl
e. /templates/orderforms/standart_cart/js/addons_liquid_domain_premium_price/scripts.js (for whmcs 8)
f. /templates/orderforms/standart_cart/js/addons_liquid_domain_premium_price/scripts.min.js (for whmcs 8)
- Login to your WHMCS Administration Area.
- Go to Setup menu > Addons Modules, and then activate addons.

- Configure addon, Enter TLD and choose role user who can access this addons.
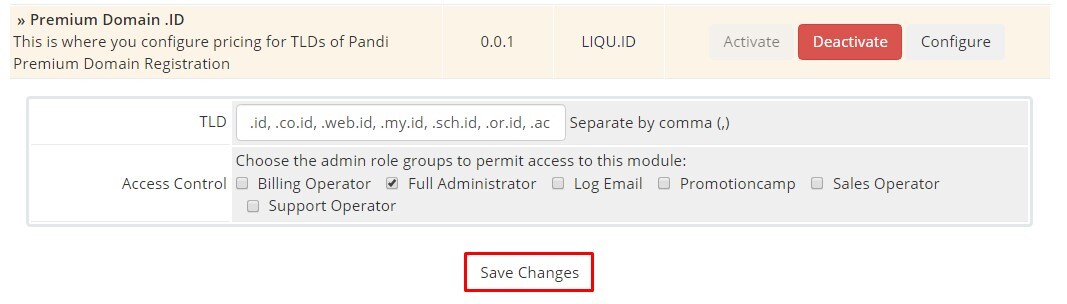
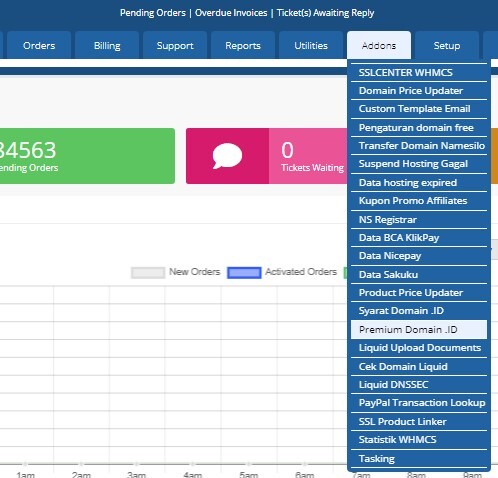
- After the installation and configuration is done, Premium Domain .ID submenu will appear in Addons menu on the admin page.
- And then, set domain TLD, currency, and enter price.
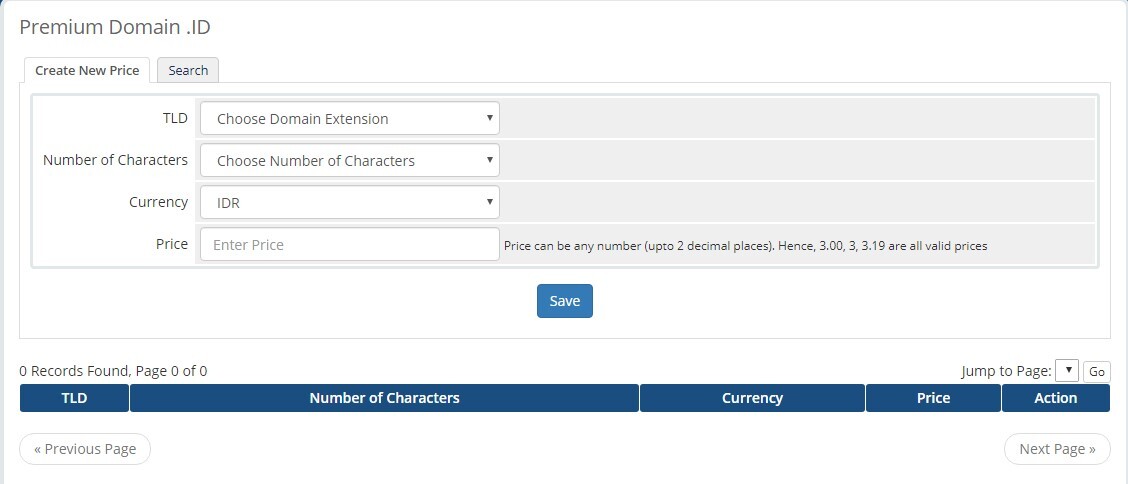
Example :

- When check premium domain availibilty at whmcs, it will show premium price.

Feedback
If you find any issues with Resellercamp’s WHMCS registrar module, please use our ticketing support systems where we’ll be available and actively listening to all of your feedback.